Because the simulation is written in Java1.1, either Netscape 4.08 or better, or Internet Explorer 5 or better
should be used to view the simulation. (Mac users may need to download
Sun's Hotjava Browser.)
Results are best displayed on a monitor with 32-bit color.
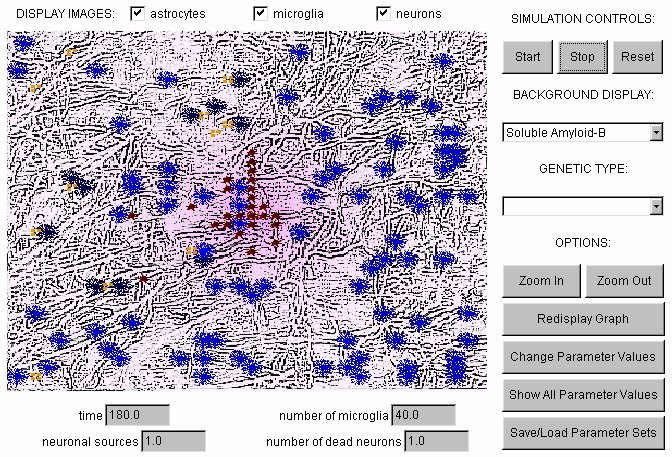
Shown here is a typical display at some instant of the simulation.
The simulation box consists of a region which contains the animation (shown in color), surrounded by panels which allow actions to be taken, or which select a variety of options for how to view the results or how to obtain information about the system at a given instant.
During the course of the simulation, the movement of the cells (microglia in green and astrocytes in blue) and the spread of amyloid and cytokines will be shown in animation. If a panel such as the one shown here does not appear, this may indicate that your browser is incompatible with Java.
Instructions for viewing the simulation and selecting options
are given in detail below.
We also describe the features currently available.
Just above the simulation screen, there is a row of checkboxes
as shown below:
When astrocytes are viewed as large cells, the darker colors indicate a more advanced state. The states of an astrocyte are inactive, receptive, motile and blocking. (See the formulation to find out more.) When the astrocytes toggle is turned off, the astrocytes are represented by blue discs. The darker colors in this case indicate a greater density of astrocytes.
With the microglia toggle turned on, microglia are viewed as red cells. When the toggle is turned off, microglia are depicted by green discs. Darker shades of green indicate a greater density of microglia.
When the neurons toggle is turned on, an electron micrograph
of nerves is shown. We find that it is much easier to view the simulation
with the neurons toggle turned off. In the case that you are
zooming in on a region, keeping the neurons toggle off, greatly
speeds up the simulation.
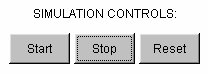
To start the simulation, press the start
button. To stop the simulation, press the stop button. The
Reset button returns the screen to a new random initial
configuration. You must stop the simulation before you can
change to a new set of parameters, or reset to new initial state.
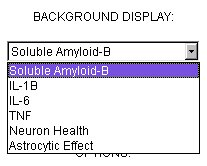
Also while the simulation is in progress, you can select the desired
view (Soluble Amyloid-B, IL-1B, IL-6, etc)
via the BACKGROUND DISPLAY pull-down menu
(found just beneath the action buttons) to the right of the screen.
(See figure below.)
This can be done continuously, while the concentrations of various
substances are changing. Soluble amyloid is shown in magenta,
IL-1Beta in turquoise, IL-6 in yellow, TNFAlpha in red,
Neuron Health in grey shades and Astrocytic Effect in grey
shades as well.
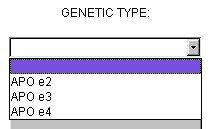
In order to change the GENETIC TYPE the simulation must
be stopped. You can then choose the genetic type to simulate
by selecting the appropriate type from the pull-down menu as
shown below. In order to incorporate the changes into the
simulation, you should reset the simulation after you
have chosen a genetic type. WARNING: Because the
simulation reads in a file with all
the parameter values for that type, all previously changed
parameters will be set to the default values for the genetic
type chosen.
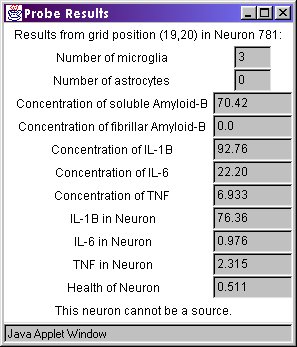
Information about the chemical concentration and number of
cells at any site inside the simulation window is available
by clicking on that site. We call this a probe.
When you click on a site, the following window appears
with the desired information:
At the bottom of the simulation window, you will see panels that
display current information about the time, numbers of cells,
etc. This is updated as the simulation proceeds.

The user may zoom in on a region (a 2 times magnification factor)
and then zoom back out by selecting the desired zoom buttons.
To "Zoom In", the simulation must be in a stopped state.
After pressing the "Zoom In" button, an instruction box will appear:

While in a zoomed state, the simulation runs significantly faster if the image for the neurons is turned off.
To zoom back out, the user simply has to press the "Zoom Out" button,
regardless of the state of the simulation.
|
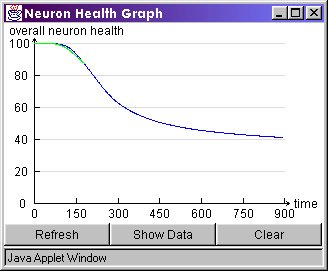
When the simulation is first initiated, a separate window titled Neuron Health Graph is displayed along with the simulation. You can close this window at any time and redisplay it by clicking on the Redisplay Graph button. The graph shows the overall neuron health as a function of time. Overall neuron health is defined in the simulation formulation. Each time you Reset the simulation a new curve will appear. The plot can show up to four curves at a time. After the fourth run, the oldest curve will be removed to make room for a new one. The colors of the curves will cycle through: blue, green, red, and orange. Clicking on the Clear button, clears all curves from the display. The plot window can be minimized, maximized, or closed by clicking on the appropriate buttons provided by your operating system. (The figure to the right shows these buttons on the upper right of the window.) |
|
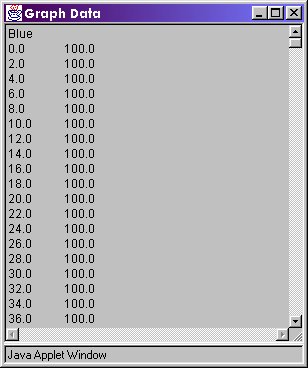
By clicking on the Show Data button underneath the graph, you can
see the exact (x,y) values used for the graph. You can then cut
these values from the window (shown below) with your browser's default
cut command (usually control-x or control-c) and paste them in to any
program or file that you like (usually with control-v). In this manner,
you can take the data and display/manipulate it with the
program (such as Excel) with which you are most comfortable.
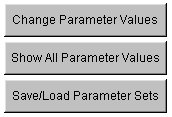
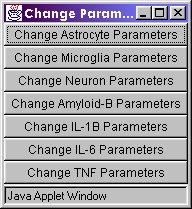
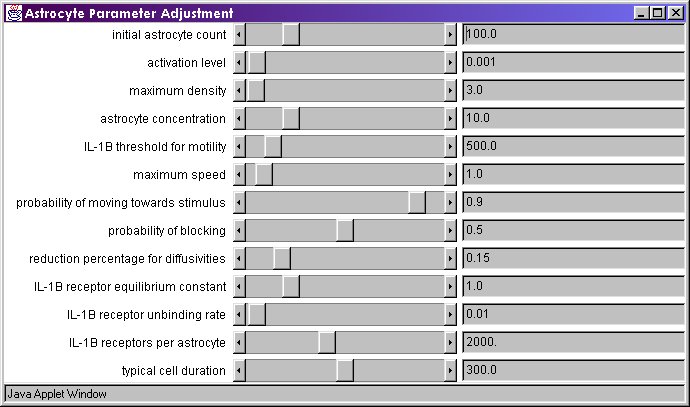
You can change almost any parameter in the simulation
by clicking on the Change Parameter Values button. When
you click on this button, a window will appear (shown below) that
gives you the option to select what type of parameter you want to
change.
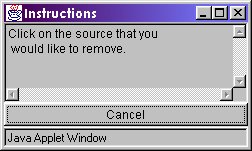
When changing the parameters for Amyloid-B, the user has the option
of removing an amyloid source, by clicking on the button labeled
Remove Amyloid Source at the bottom. Once this is done,
the following instruction
window will appear that explains what needs to be done.
By pressing the Show Parameter Values button, you can open
a window that lists all of the parameter values currently used
in the simulation. You can cut and paste these values into a
file that can then be loaded into the simulation (or batch runs)
at a later time (see below). This also is a handy tool for
specifying the parameters used to obtain results that you got
for others to verify/use.
The set of parameters that produces an interesting simulation
can be saved by using the windows shown below. By clicking on
the Save/Load Parameters option button when the simulation
is STOPPED, the slots
available for your use appear. Click on the slot that you wish to
use and then the Save/Load window will appear. To save
the current parameter values into the slot that you selected, press
the Save button. To load the parameter values that are in
the slot that you selected, press the Load button.
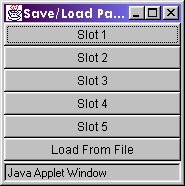

Another feature is the ability to load parameters from a file. In the course of studying a simulation, one can easily see the current parameter values by pressing the Show Parameter Values button. To save these values, simply highlight everything in the window and copy (Window users simply need to press CTRL-C) them into a text editor with the paste command (for Windows this is CTRL-V). (Note: The file must be saved as a standard text/ASCII file.) To then load these files into the simulation, select the Load From File button from the Save/Load Parameters panel. Because this requires the program to read from your computer, security restrictions in your browser's preferences need to be relaxed in order for this feature to be enabled.
To relax security in IE5, select the "Tools" menu and select
"Internet Options". Click on the "Security" tab and select
"Custom Level". On the next screen scroll
down to "Microsoft VM". Under "Java Permissions", click on
"Custom". Now the "Java Custom Settings..." button will
become active at the bottom left of the window. Click on
it. Select the "Edit Permissions" tab of the new window.
Simply change the first choice under "Unsigned Content"
and "Run Unsigned Content" to "Enable" rather than "Run
in sandbox". Because this removes all security for Java
applets, once you are done, go back to the "Security"
screen and under "Microsoft VM" change the "Java Permissions"
to Medium or High Safety.